
Module 11: Bonus Cake Decoration Illustration
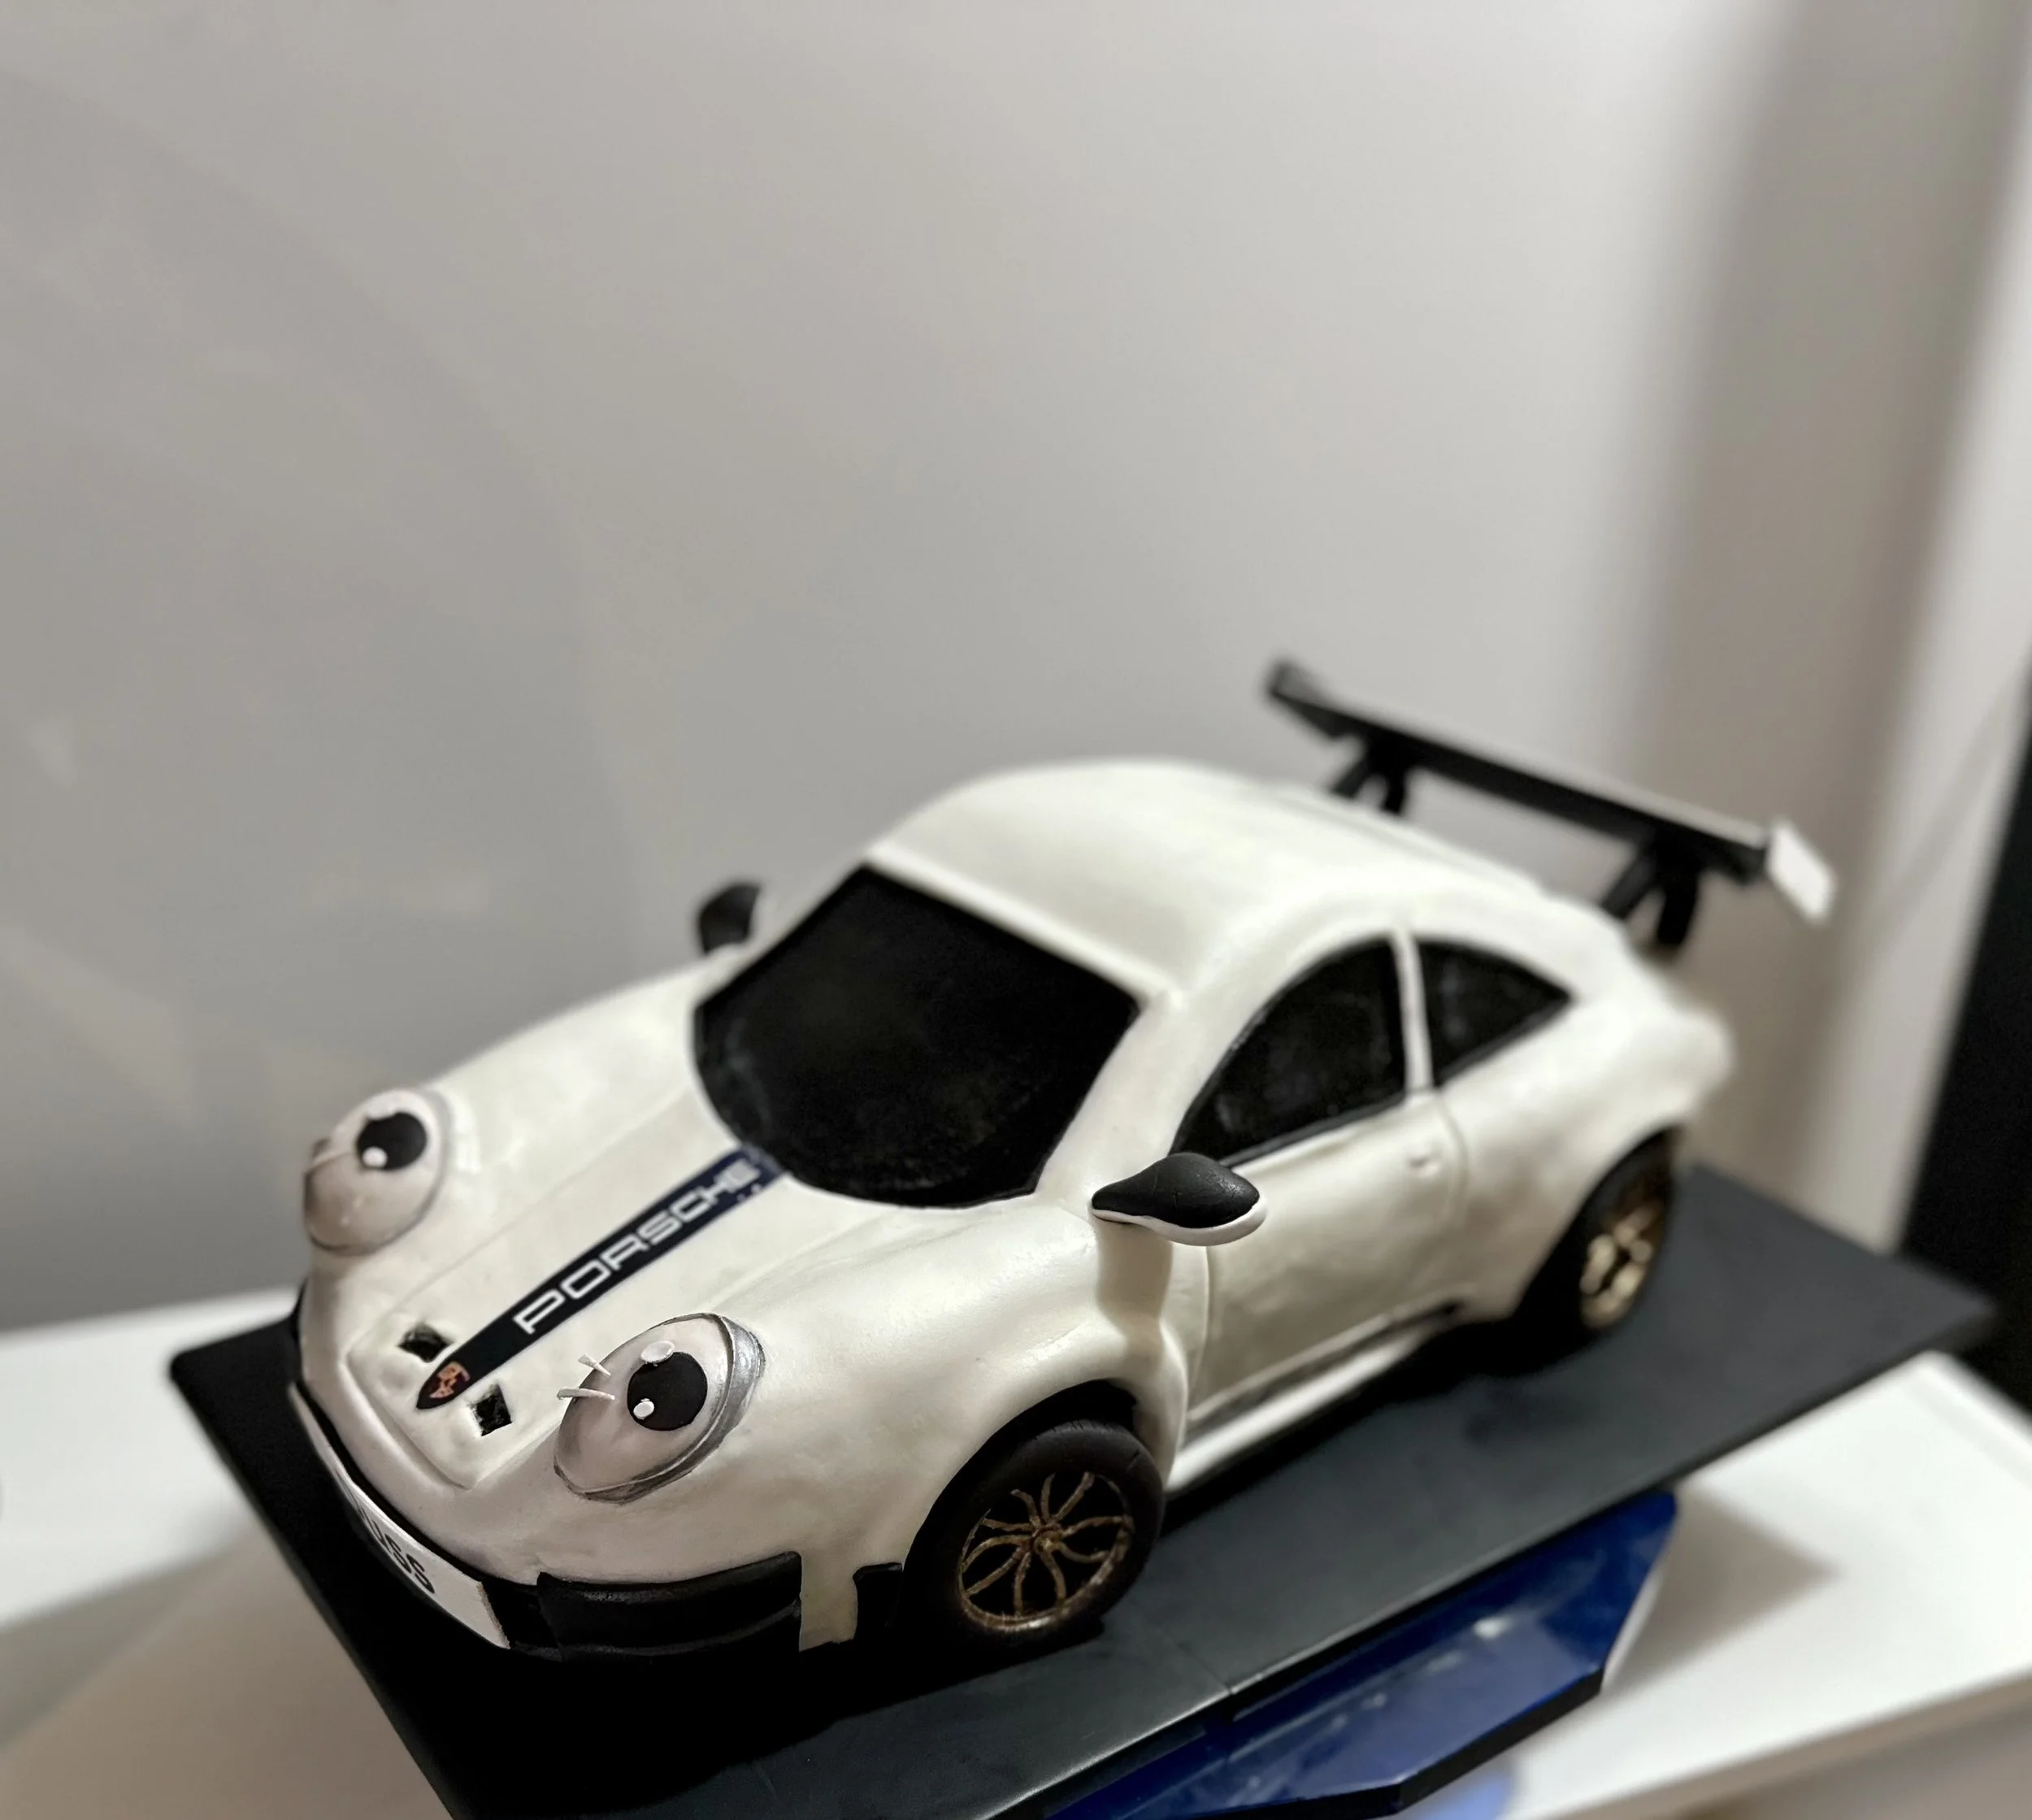
Porsche-Inspired Sports Car Cake
A Five-Day Carved Cake Project with Chocolate Cake, Hazelnut Ganache & Italian Buttercream
When my friend asked me to make a Porsche-inspired sports car cake for his best friend's birthday, my first answer was no.
I knew exactly what was involved. A realistic car cake isn't simply baked, filled, and covered with fondant. You have to plan the proportions, build the base, make templates, bake a cake strong enough for carving, prepare the fillings, construct and chill the cake, carve the body, reinforce it with ganache, cover it with fondant, and finally add all those little details that make it look like a car.
In the end, of course, I agreed.
The project took me five days, but dividing the work over several days made it much more manageable. There is no reason to rush a cake like this. Each stage becomes easier when the previous stage has had enough time to chill, dry, or set.
Inside my car was a rich chocolate cake layered with simple syrup, soft chocolate-hazelnut ganache, toasted-hazelnut Italian buttercream, and chopped toasted hazelnuts.
And after all that work, yes, there were cake scraps.
I made cake pops. No chocolate cake gets abandoned on my watch.
Chocolate Cake for Carving
I developed this chocolate cake specifically for cakes that need to be shaped and carved. I want the cake to be rich and moist enough to taste good, but firm enough that carving doesn't turn the kitchen into a landscape of chocolate crumbs.
Firm, Moist Chocolate Sheet Cake for Sculpted Cakes
I use this chocolate cake when I need a cake that can be stacked, chilled, carved, and shaped without making a mess of crumbs. It is still rich and moist enough to eat as a dessert cake, but it has the structure needed for sculpted cakes.
For my sports car cake, I bake the cake in a flat 11 × 16-inch (28 × 41cm) sheet pan. The sheet cake can then be cut according to the car template and stacked with the fillings to build the basic dimensions before carving. You will need 2 slaps for 15 in length .
Ingredients
400g all-purpose flour
100g good-quality dark cocoa powder
500g granulated sugar
6 large eggs
220ml buttermilk
200ml neutral oil, such as canola or sunflower oil
220g butter
1 tsp baking powder
1 tsp salt
2 tsp vanilla
Method
Preheat the oven to 350°F (175°C) and prepare an 11 × 16-inch flat sheet pan.
Cream the softened butter and sugar together until well combined.
Add the eggs gradually, followed by the vanilla. Continue mixing until the mixture is smooth.
Add the oil and mix until completely incorporated.
In a separate bowl, combine the flour, cocoa powder, baking powder, and salt.
Add the dry ingredients and buttermilk to the butter mixture, mixing until the batter is smooth and homogeneous.
Once everything is incorporated, stop mixing. Do not overmix the batter.
Spread the batter evenly into the prepared sheet pan.
Bake at 350°F for approximately 20–25 minutes, or until the cake is baked through.
Allow the cake to cool completely before removing, cutting, stacking, or carving.
Why This Cake Works for Carving
The goal isn't to make the densest cake possible. It needs a balance between structure and moisture.
The butter contributes flavor and structure, while the neutral oil helps the cake remain moist even after chilling. Buttermilk adds moisture and complements the dark cocoa.
Most importantly, once the flour is incorporated, don't overmix. You want enough structure for carving without making the finished cake unnecessarily tough.For the Sports Car
Once completely cooled, use your scaled templates to determine how the 11 × 16-inch sheet cake should be cut.
Stack the pieces with simple syrup, soft chocolate-hazelnut ganache, and toasted-hazelnut Italian buttercream, checking the template as you build so you reach the required height and width.
Chill the assembled cake thoroughly before carving.
Soft Chocolate-Hazelnut Ganache Filling
This is the softer ganache I use inside the cake.
Ingredients
500g dark chocolate, 55%
450ml heavy cream, 35%
50g butter
200g hazelnut paste
Method
Melt the chocolate.
Warm the cream and butter and combine with the melted chocolate.
Add the hazelnut paste.
Use a handheld immersion blender to emulsify the mixture until smooth and glossy. Allow it to reach the proper consistency before assembling the cake.
This ganache is deliberately softer than the ganache used on the outside of the carved cake.
Easy Hazelnut Filling Option
If you cannot find hazelnut paste, you can use Nutella or another chocolate- spread instead.
In that case, skip the soft chocolate-hazelnut ganache recipe entirely and use the chocolate-hazelnut spread directly as one of the filling layers.
For the sports car cake, layer:
Chocolate cake → light simple syrup → chocolate-hazelnut spread → toasted-hazelnut Italian buttercream → next cake layer
You can still add the toasted chopped hazelnuts for extra flavor and texture.
Confidence Note
Don't confuse this substitution with the firm chocolate-butter ganache used on the outside of the carved cake. You still need that firmer ganache for coating, shaping, and smoothing before the fondant goes on.
That's an important distinction for beginners. Otherwise someone will enthusiastically coat the entire Porsche in Nutella and discover that their sports car has become a delicious landslide.
Firm Chocolate-Butter Ganache for Carving
This is my structural ganache. I use it after carving to hold the shape of the car and create a firm, smooth surface underneath the fondant.
Ingredients
750g dark chocolate, 55–60%
375g unsalted butter, softened to room temperature
Method
Place the chocolate in a microwave-safe bowl and melt it in approximately 30-second intervals, stirring between each interval.
Once the chocolate is completely melted and smooth, gradually mix in the softened butter.
Allow the ganache to reach a spreadable consistency before using it to coat the carved cake.
Why Two Different Ganaches?
The soft chocolate-hazelnut ganache is designed for eating between the cake layers.
The chocolate-butter ganache is firmer and is used on the exterior to reinforce the carved shape and provide a smooth foundation for fondant.
One ganache is concerned with pleasure. The other has been promoted to structural management.
Toasted-Hazelnut Italian Buttercream
Prepare your Italian buttercream using:
454g butter/1 lb
150g egg whites
300g sugar
Then add:
200g hazelnuts, toasted and chopped
You can link this section directly to your full Italian Buttercream recipe rather than repeating its complete technique in this already enormous car-shaped adventure.
Fold or mix the toasted chopped hazelnuts into the prepared buttercream.
Espresso Simple Syrup
The espresso syrup adds moisture to the chocolate cake while giving it a subtle coffee flavor that complements the dark chocolate and toasted hazelnuts.
Ingredients
300ml water
150g granulated sugar
2 tsp instant espresso powder
Method
Combine the water and sugar in a small saucepan. Heat until the sugar has completely dissolved.
Add the instant espresso and stir until dissolved. Remove from the heat and allow the syrup to cool completely before using.
How to Use
Lightly brush or drizzle the cooled espresso syrup over each chocolate cake layer before adding the filling.
Use enough to moisten the cake, but don't soak it heavily. For a carved cake, you still want the layers to remain firm and stable.
Confidence Note
The espresso isn't there to turn the cake into a coffee cake. It supports and deepens the chocolate flavor while balancing the richness of the hazelnut filling.
And because this cake has to survive stacking, refrigeration, carving, ganache, fondant, wheels, mirrors, and your continuing artistic ambitions, “lightly brush” is the important part. This is a Porsche, not tiramisu.
Layering the Sports Car Cake
Once the chocolate cake is completely cool, cut the sheet cake according to your scaled templates and begin building the basic shape of the car.
For each cake layer, assemble in this order:
Chocolate cake → espresso simple syrup → toasted-hazelnut Italian buttercream → soft chocolate-hazelnut ganache → next chocolate cake layer
Lightly brush the cake with the espresso simple syrup. Don't oversoak it; the cake needs to remain firm enough for carving.
Spread a layer of Italian buttercream mixed with toasted chopped hazelnuts, followed by a layer of the soft chocolate-hazelnut ganache.
Continue stacking until the cake reaches the height required by your template.
Once assembled, refrigerate the entire cake until it is very cold and firm before carving.
If Using Nutella
If hazelnut paste isn't available and you're using Nutella or another chocolate-hazelnut spread, skip the soft ganache recipe and use the spread in its place:
Cake → espresso syrup → hazelnut buttercream → Nutella → cake
That makes the flavor structure much clearer too: the buttercream provides the toasted-hazelnut texture, while the ganache gives you the softer, rich chocolate-hazelnut layer.
Before You Start: Scale the Car
Before baking anything, decide how large you want the finished cake to be.
I start with the dimensions of the real car and reduce them proportionally to the size of my cake. This gives me the correct relationship between the length, width, height, wheel placement, windows, and other major features.
From those measurements, I make my templates.
You can use AI to help calculate the scaled dimensions, but always check the measurements yourself before cutting the cake or boards. AI has many talents; being blamed for a Porsche with a three-foot windshield should not become one of them.
I can provide the prompt I use for calculating the proportions along with my printable templates.
Building the Cake Base
I prepare two boards.
The first is the presentation base. I use a thick cake board cut to the size I need and cover it neatly with self-adhesive vinyl/contact paper. I think self-adhesive vinyl or adhesive contact paper is the term you were trying to remember.
The second board is cut specifically to support the cake itself.
I raise this cake board slightly above the presentation board. The hidden lift creates space underneath the car body so the wheels can sit naturally instead of making the cake look as though someone stole its suspension.
Make sure the support system is sturdy enough for the finished cake.
Make the Wheels and Structural Decorations Early
The wheels and tires should be prepared ahead of time because they need time to dry and become firm before they are attached to the cake.
I like Saracino modelling paste for sculpting.
If modelling paste isn't available, I can adjust the consistency of fondant with materials such as CMC/Tylose, modelling chocolate, or gum paste, depending on the piece I am making and how firm it needs to become.
I also make pieces such as the rear wing/spoiler ahead of time so they have time to set.
My Five-Day Sports Car Cake Schedule
Day 1 — Planning, Templates & Structural Pieces
Measure the real car and scale its dimensions to the desired cake size.
Prepare the templates and two cake boards.
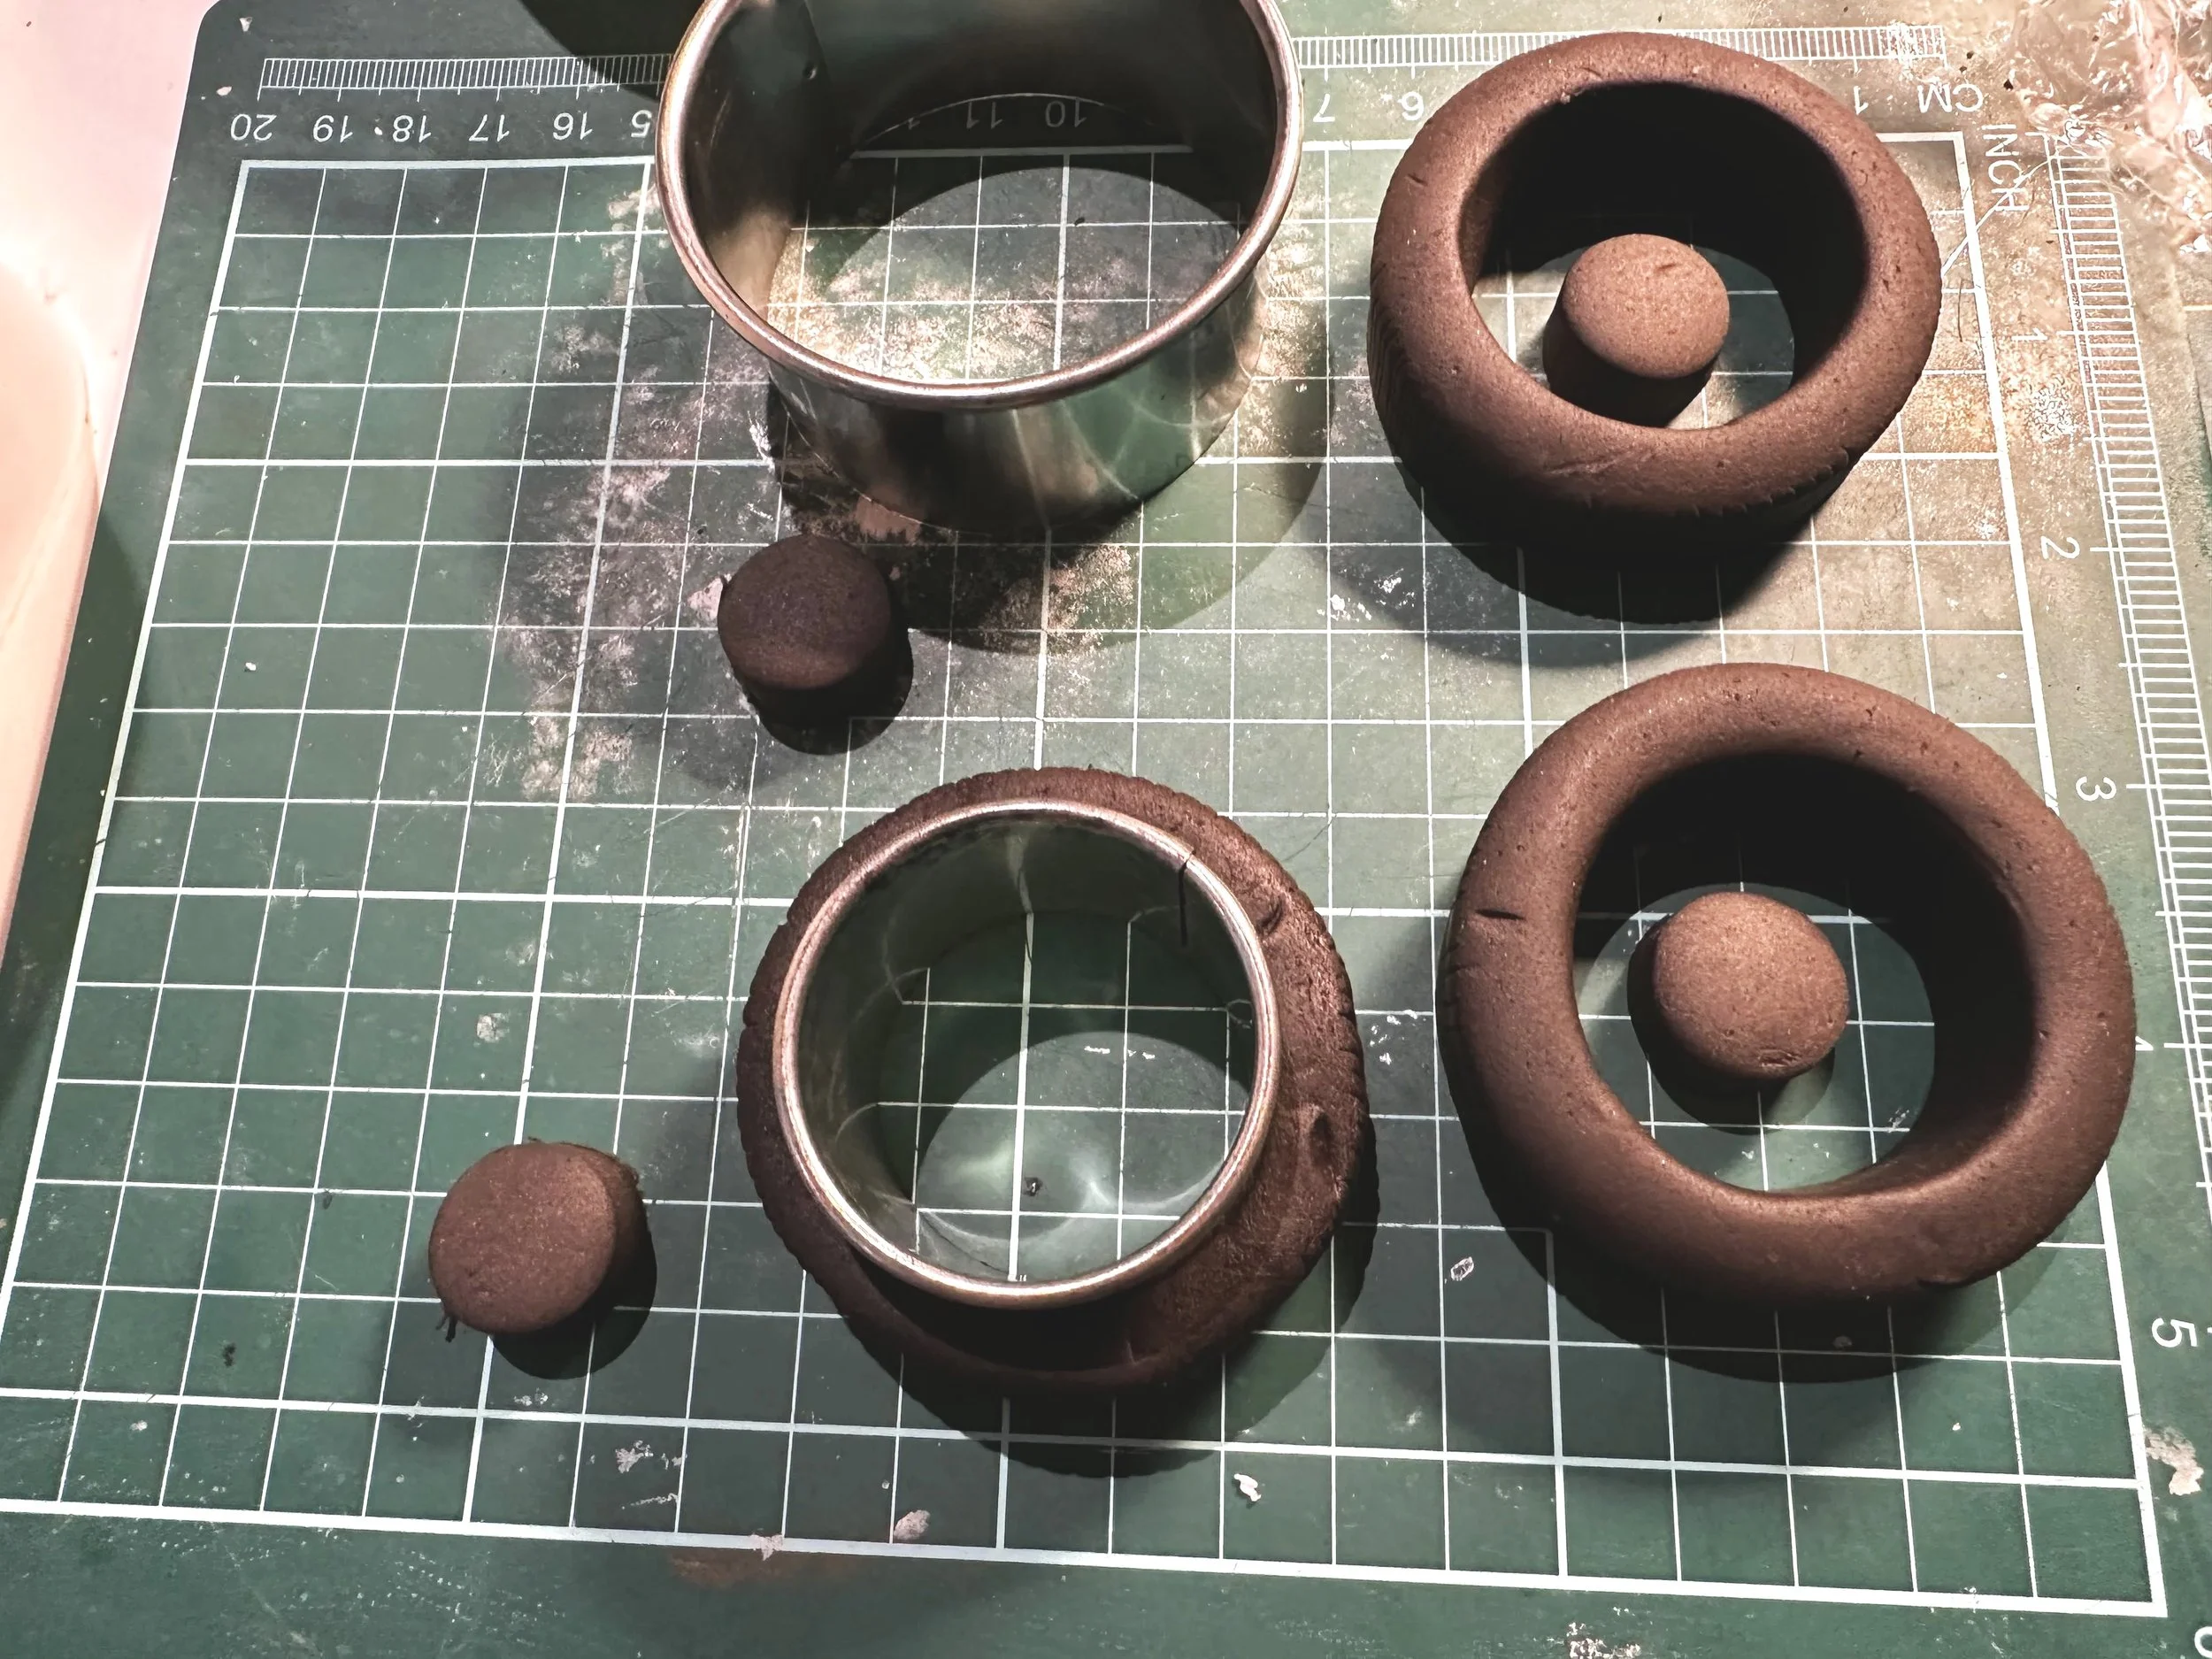
Make the wheels, tires, wing, and any other pieces that need time to dry.
Day 2 — Bake, Fill & Build
Bake the chocolate cake.
Prepare the Italian buttercream, toast and chop the hazelnuts, make the soft chocolate-hazelnut ganache, and prepare the firmer chocolate-butter ganache.
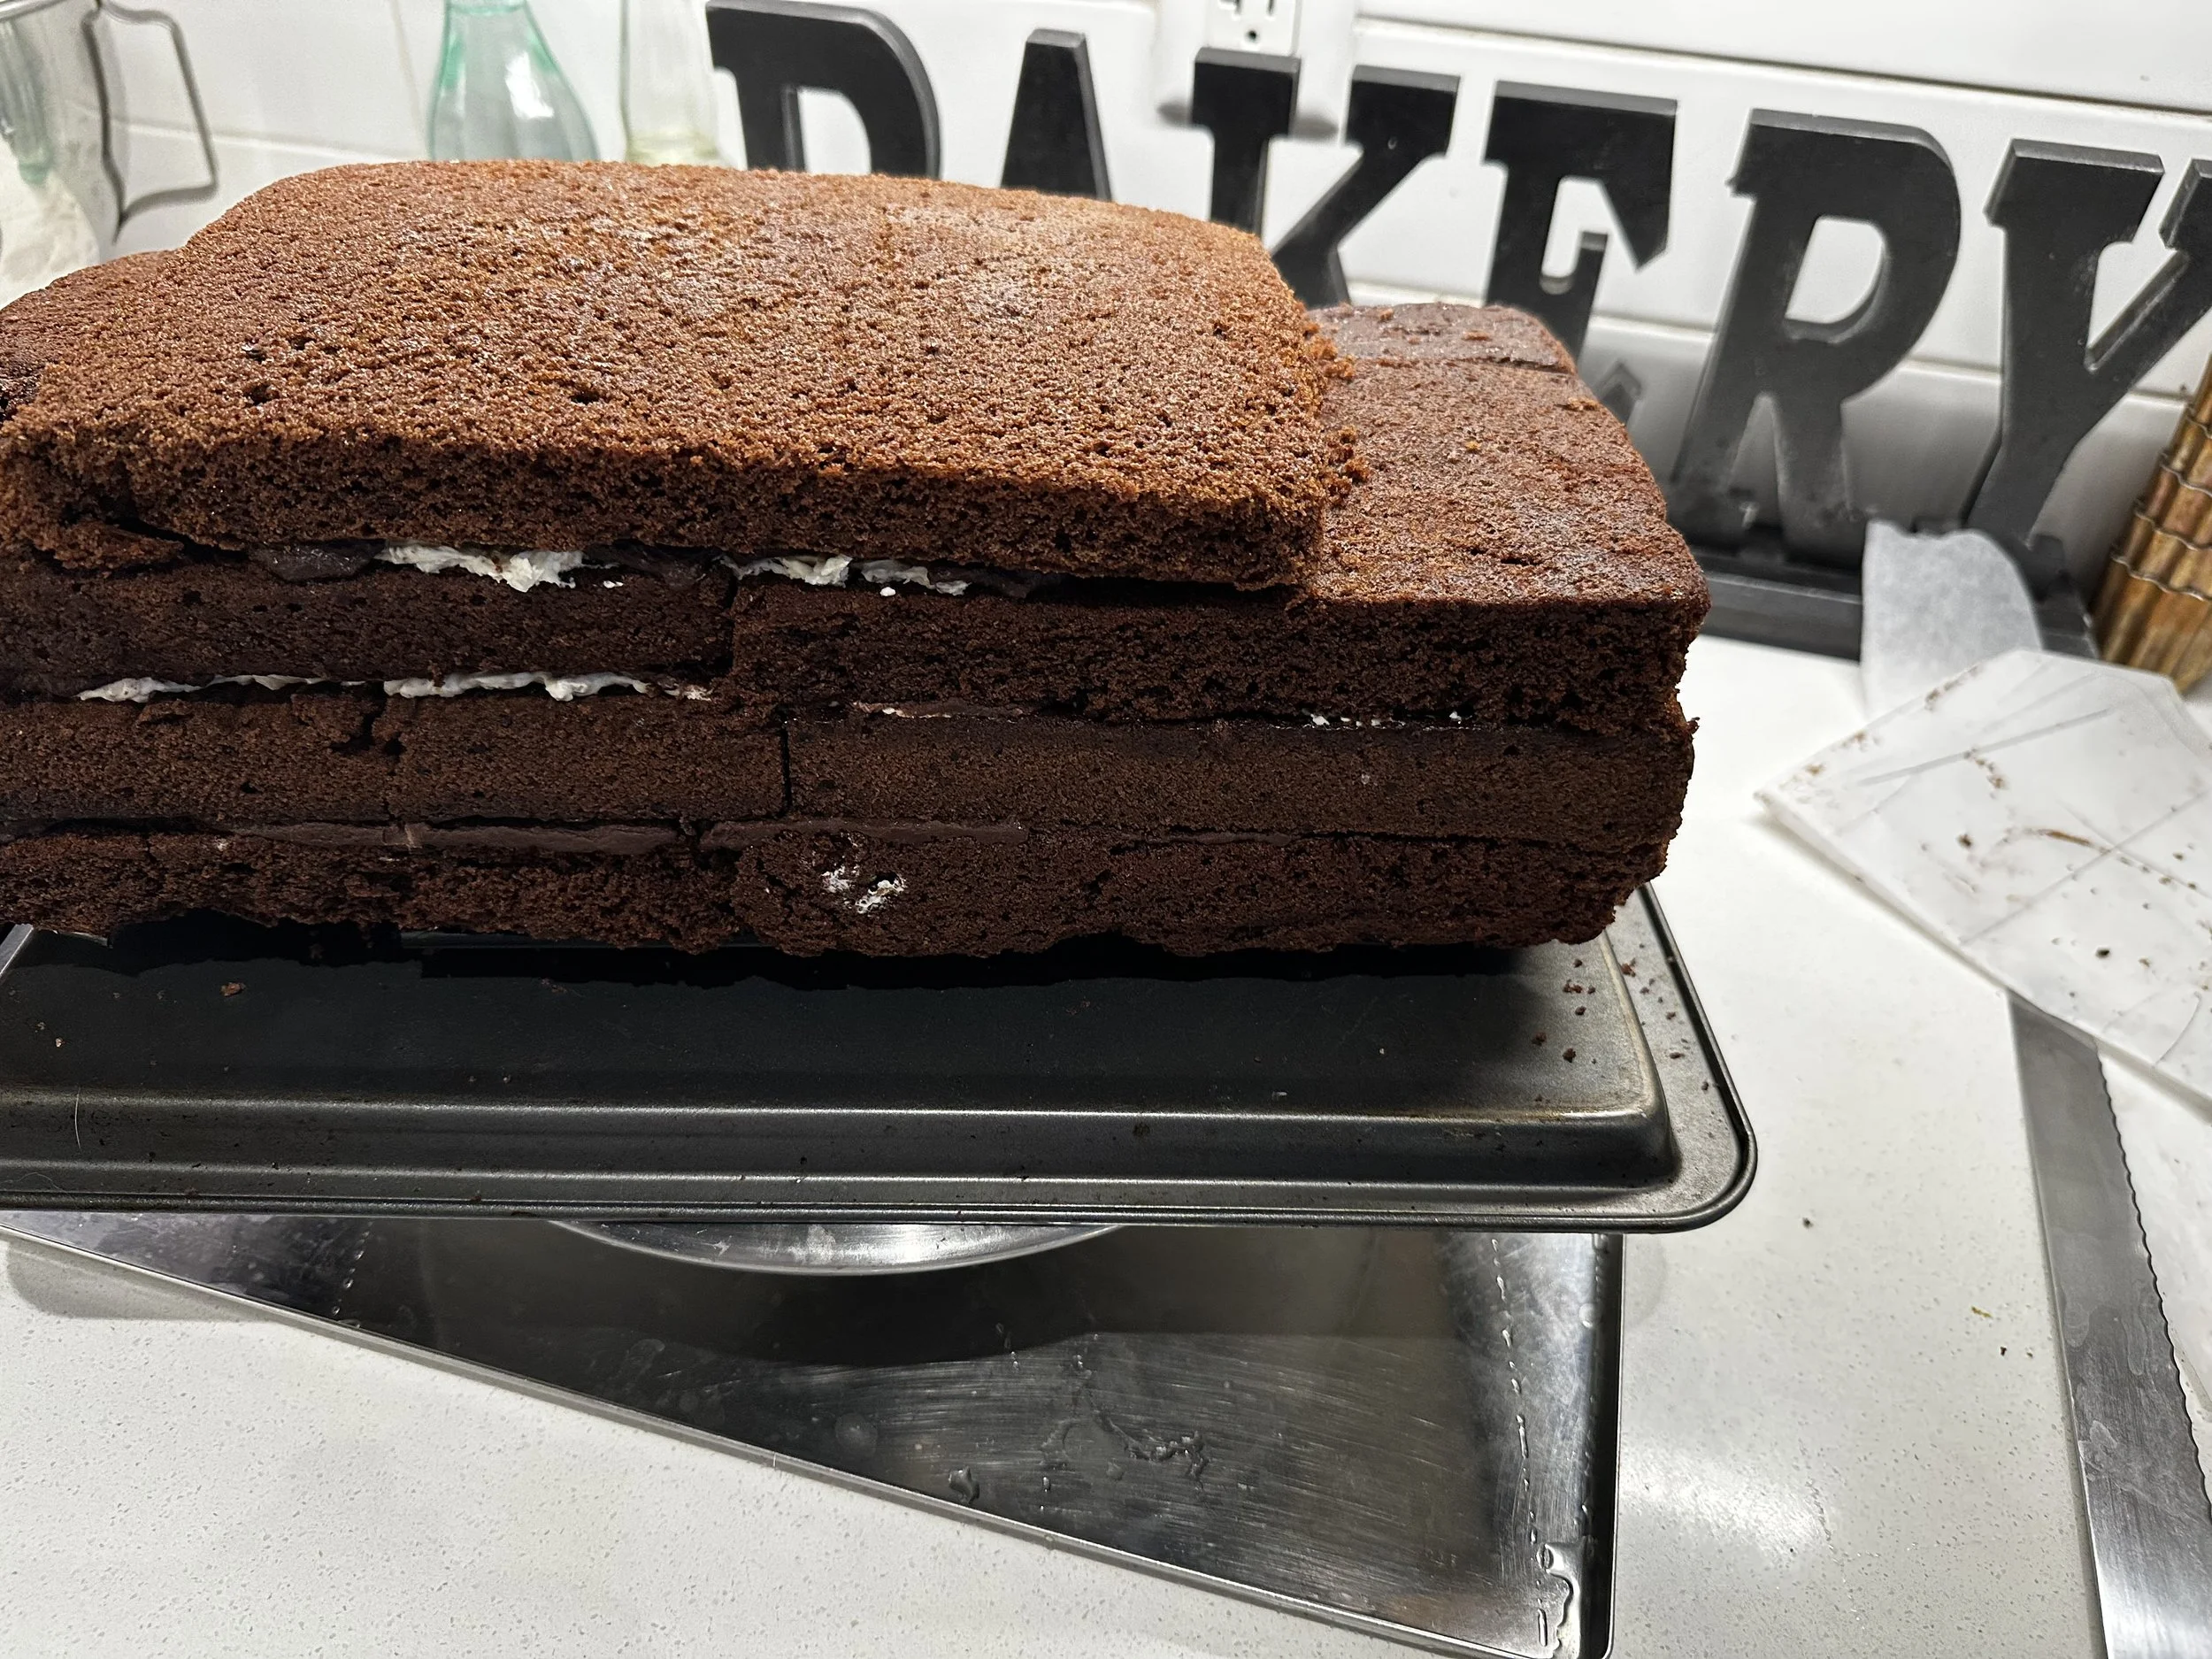
Using the templates as a guide, begin building the cake to approximately the required length, width, and height.
Layer the cake with a little simple syrup, soft chocolate-hazelnut ganache, and toasted-hazelnut buttercream.
Once the cake reaches the required dimensions, refrigerate it until thoroughly cold and firm.
Then begin carving.
Don't rush the carving.
Remove small amounts at a time and continually compare the cake with your templates.
If you accidentally carve slightly too deeply, some of the reserved cake crumb can help repair a small area before coating.
Save the remaining clean cake scraps for cake pops. Waste not, want not; you've already purchased enough chocolate to affect commodity prices.
Day 3 — Refine the Shape & Ganache
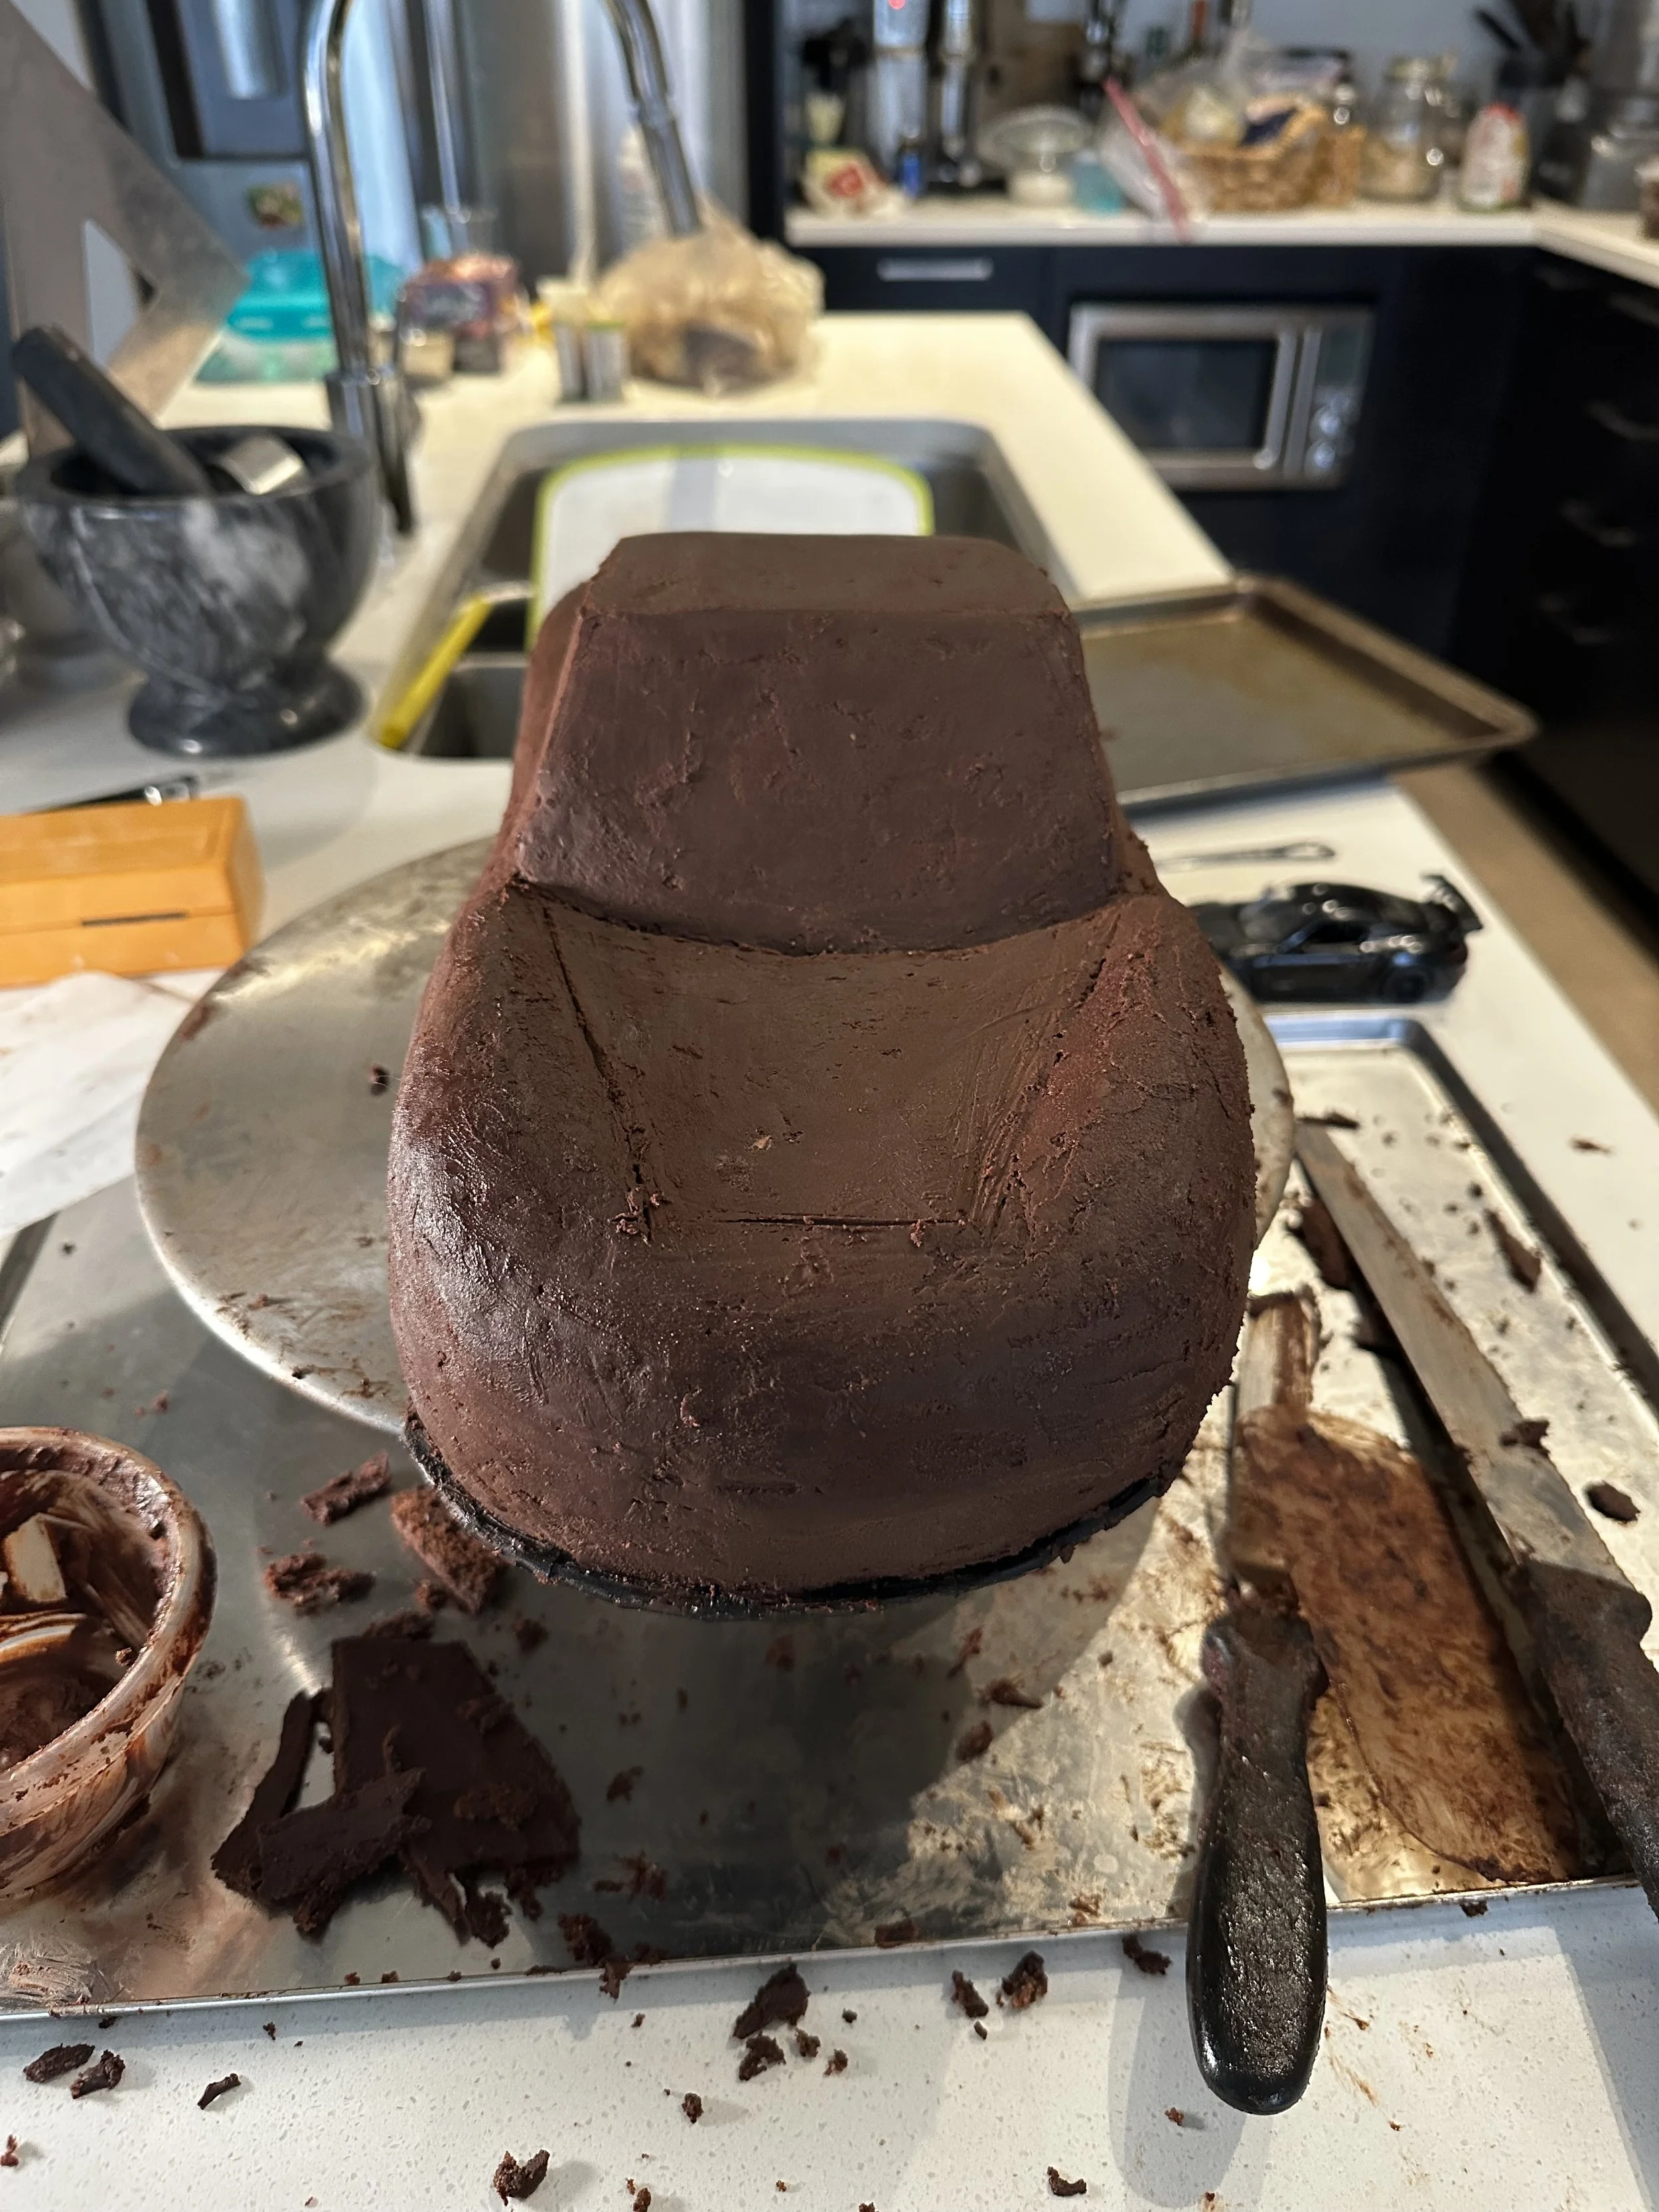
Look at the chilled cake again with fresh eyes.
Check the profile, hood, roof, sides, windshield angle, wheel areas, and overall proportions. Make any final carving adjustments.
Crumb-coat the cake.
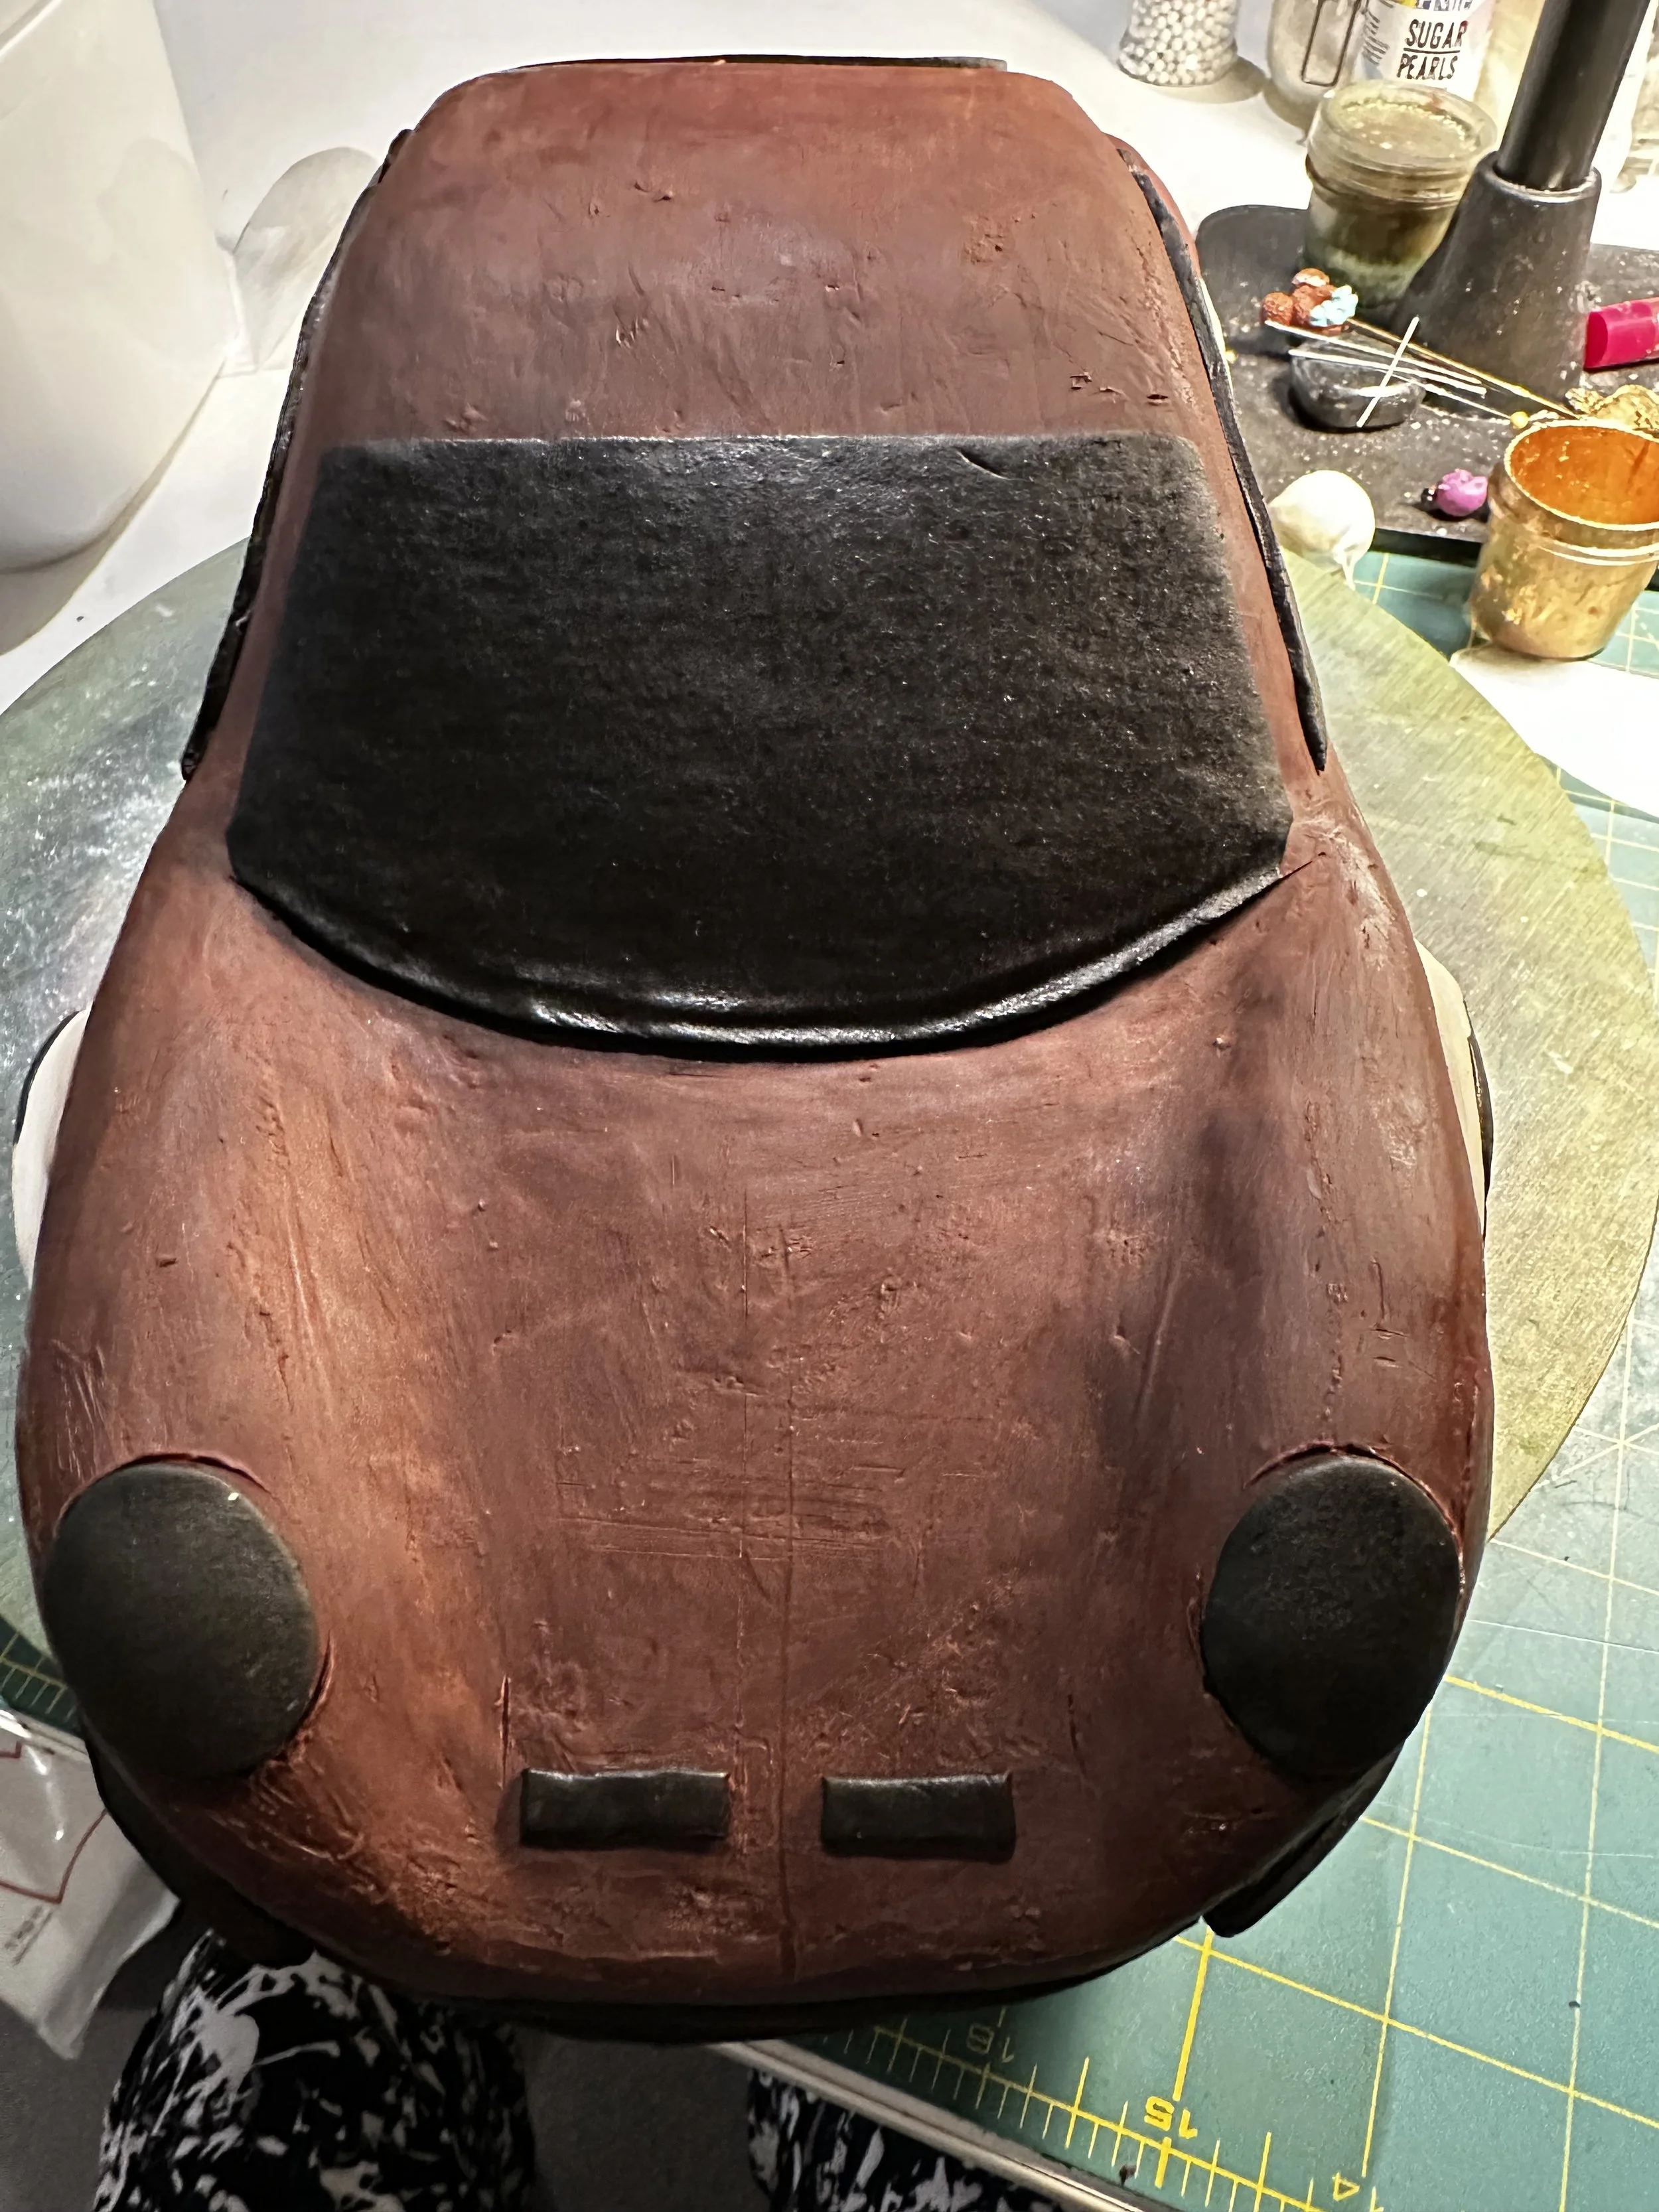
Cover the entire car with the firm chocolate-butter ganache. Use the ganache to strengthen the shape, sharpen important lines, and smooth the surface.
Chill until firm.
Next, prepare and apply the black fondant elements for areas such as the windshield, side windows, rear window, bumpers, vents, and other dark details.
Day 4 — White Fondant & Main Details
Cover the entire car with white fondant, including over the black fondant areas underneath.
Smooth the white fondant carefully over the contours of the car.
Then trim and remove the white fondant where the windows and other black sections should appear, revealing the black fondant underneath.
I really like this technique and would emphasize it in your tutorial. It creates cleaner, more integrated windows than simply sticking black pieces onto the finished white body. The windows look like part of the car rather than fondant patches that arrived late to the meeting.
Make and attach the side mirrors, headlights, and other major details.
Add any edible printed elements or logos you have prepared.
Day 5 — Finishing
Now comes the enjoyable part: the details that bring the car to life.
Add painted details and shading where needed.
Use edible silver dust or metallic color on the mirrors, wheels, trim, or other appropriate areas.
Attach the remaining decorations and inspect the cake from every angle.
Make small corrections where necessary.
And then:
Stop.
Seriously. Put the paintbrush down.
After five days, the cake is finished.
Relax.
What I Learned Making This Cake
A carved sports car cake is much easier when you divide the work over several days.
The biggest lesson is not to rush. Chill the cake before carving. Remove small amounts rather than making large cuts. Continually check the templates. Give modelling pieces enough time to dry. And use a firm exterior ganache to refine the shape before covering the cake with fondant.
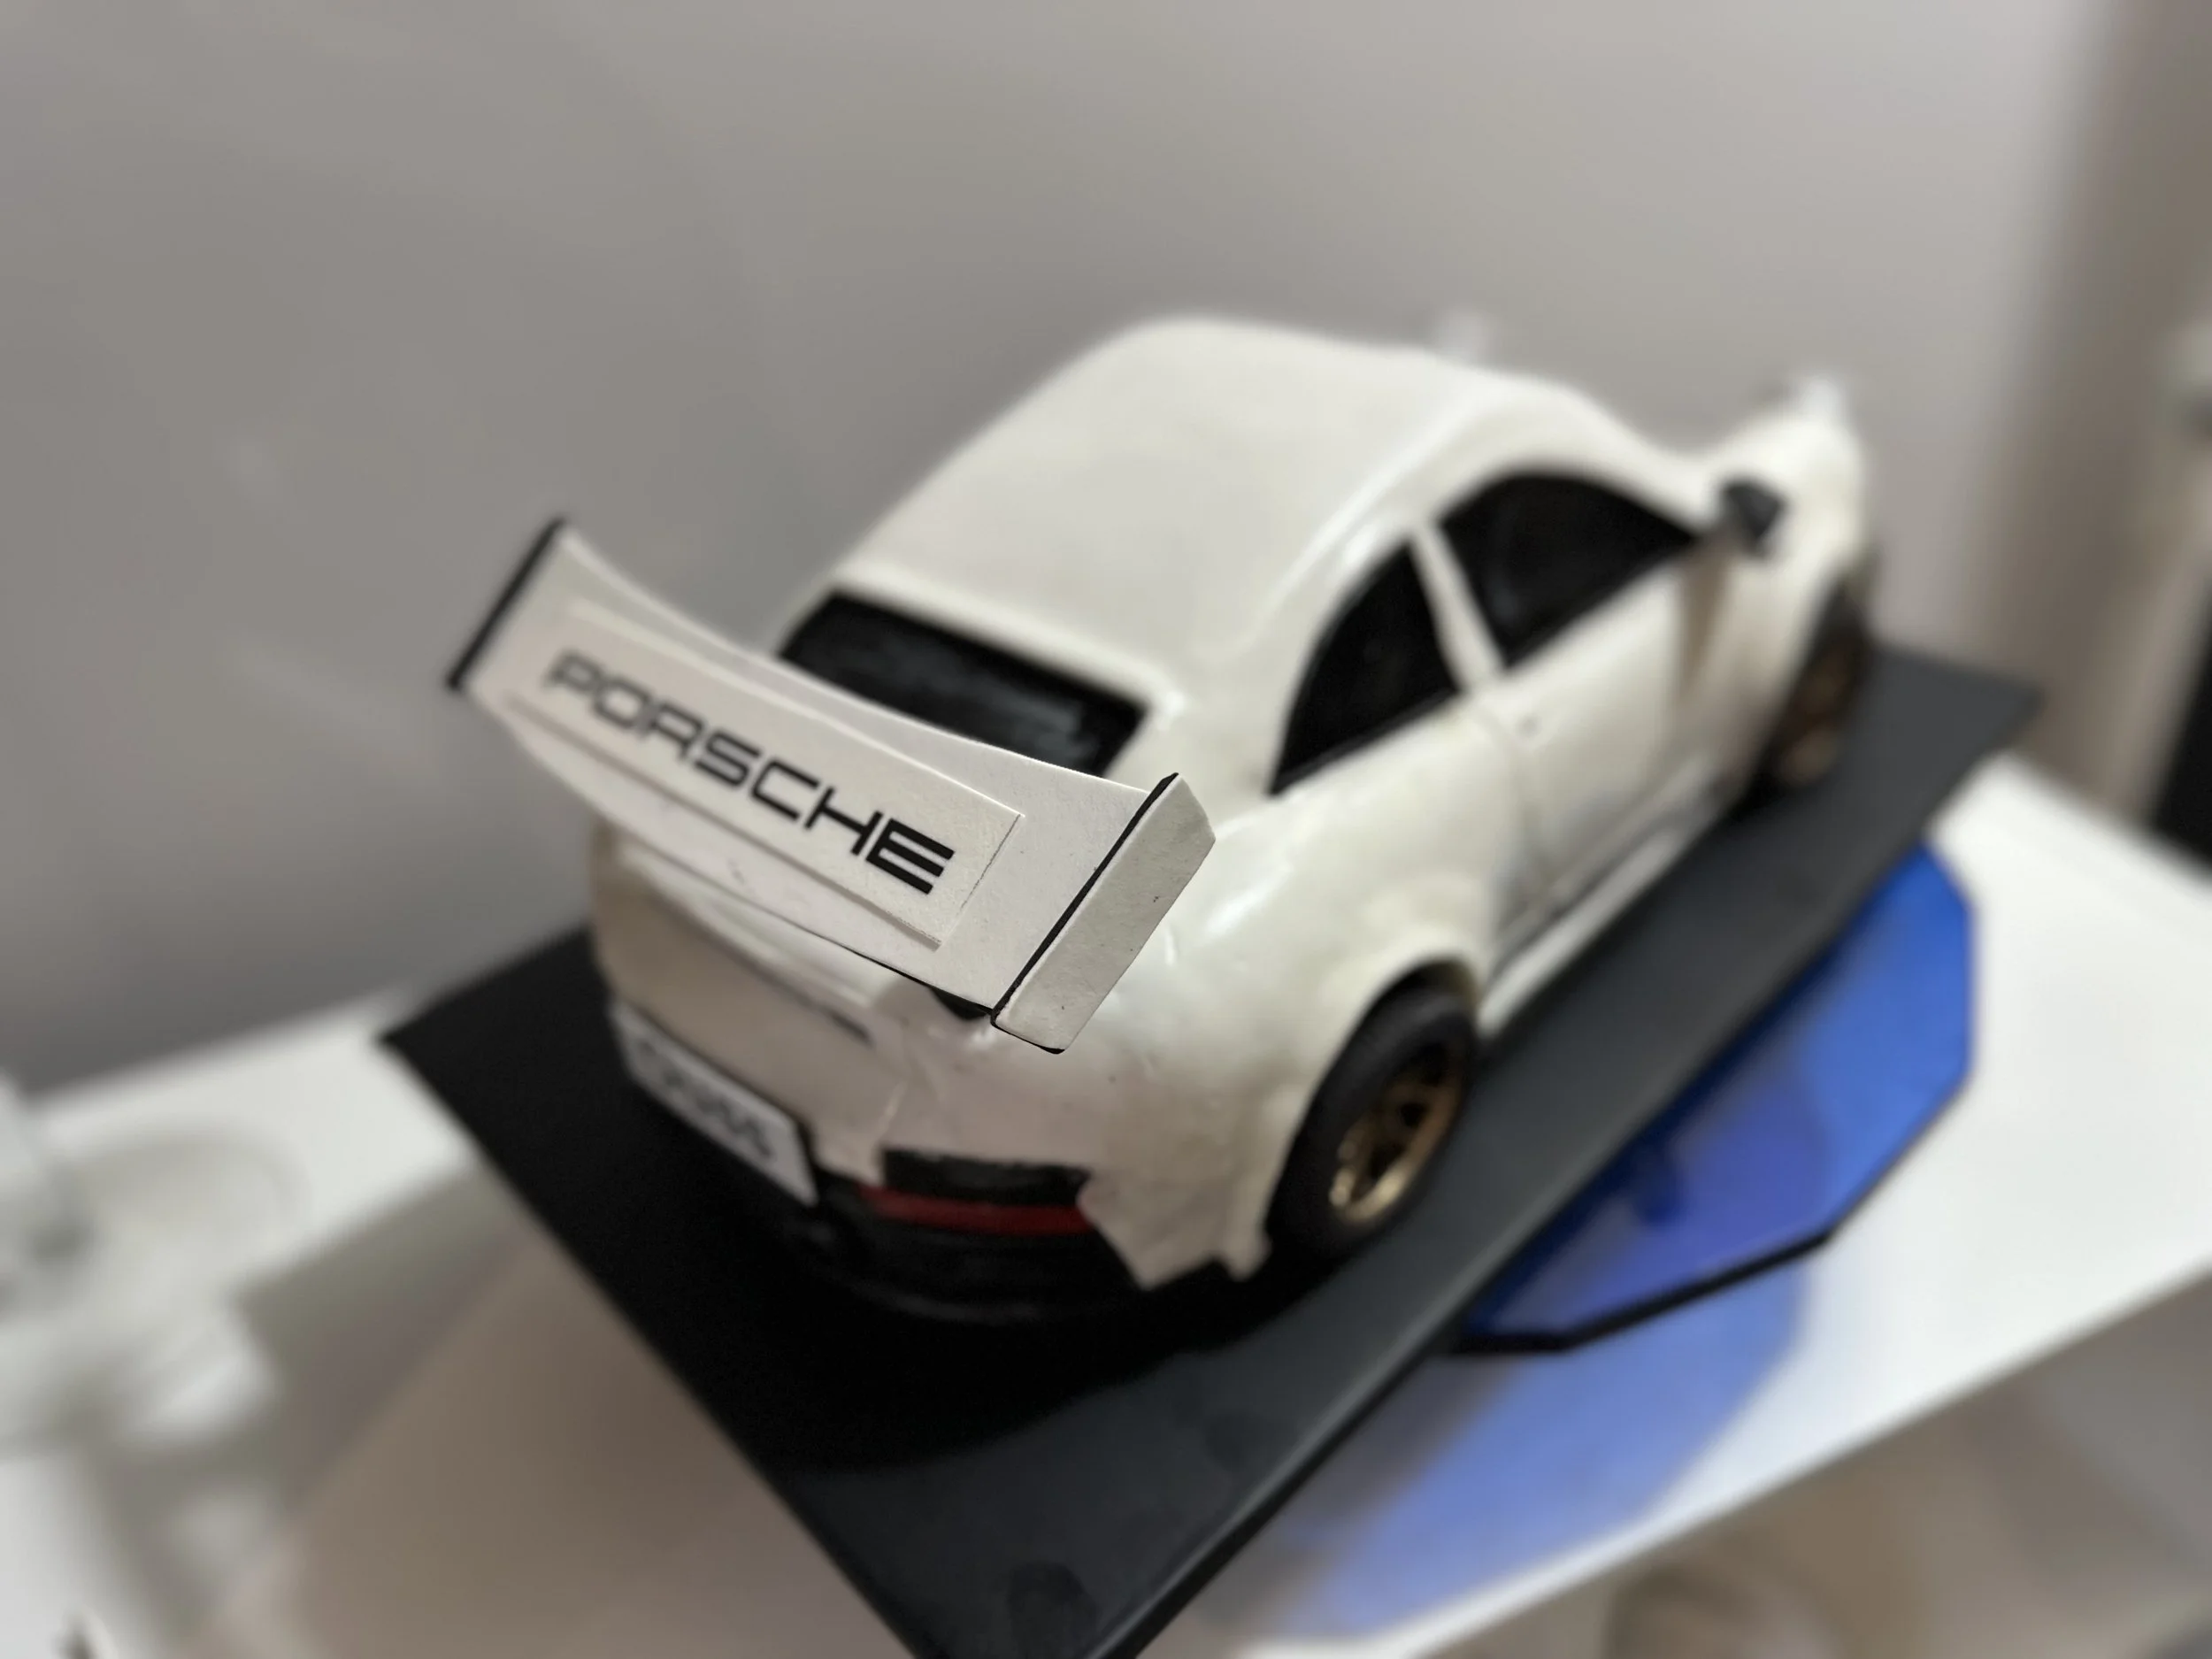
My finished cake wasn't a mechanically perfect miniature Porsche, but that wasn't really my goal.
I wanted my friend's best friend to receive a cake that was recognizable, personal, fun—and genuinely delicious underneath all the decoration.
After five days of work, I thought my little sports car turned out pretty cute.
And when I looked at the pile of chocolate cake left from carving?
Cake pops. Obviously.